How Do You Close An In-Ground Pool?
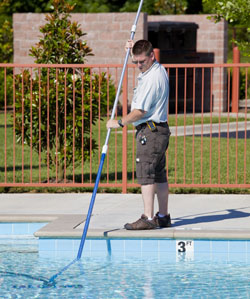
Start off by testing the water to make sure that the pH and other levels are within normal ranges. At this point, you need to shock the pool; afterward, operate the filter no less than one full day. You can now close the pool, get rid of leaves and other debris, and do a complete vacuuming job. Then it's time to put in what's in the closing kit.
Now you will clear any water that is contained in the lines. You need not empty the pool to accomplish this. It requires the use of a shop vacuum or air compressor. Here's what you do with a compressor: Get a used winterizing plug. Remove the screw in the center. Install a 1/4" compressor hose male adapter into the resulting hole. The best choice is a number nine size plug. This can now be used for any of the filter's plumbing. Here's one way to blow out your lines. Leave in all the plugs for both the pump and the filter. Adjust the multi-port valve to the filter setting. Make sure all the plumbing line valves are shut except for the line you want blown out. Open the air release above the filter, and press the winterizing plug connected to the compressor line to force air into the filter. This forces the water from the filter and expels the water from the tube. For both the skimmer and the returns, watch for air bubbles. When you see them, put in the winterizing plug. Open only the main valve on the drain. Force air steadily into the line until bubbles appear. Then close the valve right away to keep air in the line and hold back the water from reentering. For pools with step jets, all you need to to is open up the pool's air vents, take out the jet and stop up the casing with a plug. Next, you should open the jet valve on the filter. The force of the air will cause all the water to whoosh out of the air vents simultaneously. Once that's done, take off the compressor and close the air vents. That's it! You've blown out your lines. Look for air bubbles in all the plugs.
Next, take out the pump's plugs; take out the winterizing plug located at the filter's base. For pools with chlorinator features, take out the plugs or the actual chlorinator device. Be very thorough about shaking out whatever water has accumulated within the chlorinator. To prevent damage to the inner workings, you should set the multi-port valve between any two settings. In that way, the valve will be held open.
The pump should not be covered during the off season. As it is bad to have the pump innards oxidize, you want to give the pump a chance to breathe.
Be sure to turn the gas off your pool heater and take off the winterizing plug that you'll find beneath the manifold. It is important to ensure that the heater is covered. Go to our catalog you'll find on the Internet to look at heater covers. This keeps foliage and other items from entering the heater equipment, which could lead to a fire.
If you decide to use a vacuum for the purpose of clearing the plumbing lines, one easy method is to get a couple of pieces of schedule 40 PVC pipe. You would then count the number of returns you have. That will be the number of 1 ½” 90° pieces necessary. Take an inventory of your pool's skimmers, because that lets you know the number of 1.5 inch male adapters that are required. Take your measurement from the lowest point of a skimmer to the water surface, and then add an additional two inches to that number. Measure and cut a piece of PVC. Glue the male adapter onto the PVC. Be sure to wrap the threads with Teflon tape, then screw the adapter into the suction hole on the underside of the skimmer. You could also use our "blow-out gadget". Wind Teflon tape around the threads. Then you can blow out your skimmer. Additionally, this works as a baffle that prevents cracks in the skimmer during freezing weather. Next, you should measure the return holes to the surface of the water - plus 2". The PVC should be cut to this length, then you should glue the 90° pieces and wrap the threads with Teflon tape Screw this onto the returns, and make sure the pipe remains above the surface of the water. At this point, you can winterize your plumbing. Open up the valves and survey the piping. Use your vacuum to remove water from all the lines. Once all the water is emptied from the lines, install and secure a #8 winterizing plug.
Insert the vacuum's hose into the pump trap after opening it, then open up the primary drainage valve. Put the vacuum into reverse mode, then force air inside of the line. Even if you don't see any air coming from the main drain, let this happen for half a minute before closing the valves. This forces the water under the ice layer to prevent the pool from freezing. In some cases, in-ground concrete swimming pools might require emptying the contents with the help of an air compressor. You should purchase our anti-freeze if you notice areas where water may collect or if you have problems removing some of the plugs. Use this in any location where you might encounter trouble.
Use a quart sized bottle (e.g. bottle that formerly contained algaecide) if you are using PVC in your skimmer. Add pea gravel until it is half full, replace the cap while inverted, then install it in the pool skimmer. Use this, and your skimmer will not crack in the frigid weather.
If you are removing the ladders and handrails, you will want to take off the decorative cover. Then you can loosen the bolt about 1/4" up and hammer it in. That will loosen the ladder or the handrail you are using. Next, just raise it up from the cup. For vinyl pools, retain the ordinary or in-season water depth rather than draining beneath the level of the skimmer. That will keep the liner from getting shrunk around the corners, thereby shortening the liner's life. You do not need to lower the level of your vinyl pool. If you drain your vinyl pool, the dealer or maker will consider the warranty voided. For pools made of concrete, it is necessary to drain the water 12 inches or more beneath the skimmer. This keeps the seal structure from developing any cracks, which would result in loss of tiles and coping. You can now install the cover soon.
With a water tube cover, you want to make sure that you only put enough to fill the tubes three fourths of the way, and then you should place the cover and tubes on the rim of the pool. The water tubes should be adjacent, like sardines in a can. Don't place water tubes inside the cover loops. If the cover blows into the pool in winter it will be darn near impossible to re-install it properly if the tubes are attached, because it will be dragged down so deep.
For pools with safety covers, elevate the metal anchoring devices, then replace the safety cover as usual. Be sure to secure any straps that aren't tight enough.
If your pool cover has water tubes, position the cover pump at the midpoint, then drain the cover if it collects rainwater. Never try to suction the cover if it is iced over, since this is destructive to the pump. When you've already got a vinyl pool with a covering over it, then just put a cover pump in your skimmer. This helps avoid excess water being pumped out while it enables convenient accessibility.
The water level has to be below the top of the tiles for a concrete pool. If you need to you can install a covered pump on the second step.
Tip: Closing a pool is a big job. If you don't want to deal with it, contact a pool cleaning service today.